※ rails6に対応させてあります
初心者向け : Railsログイン機能をつけてQAサイトを作る 1 -ログイン機能+質問機能-
初心者向け : Railsログイン機能をつけてQAサイトを作る 2 -Bootstrap+UI修正-
初心者向け : Railsログイン機能をつけてQAサイトを作る 3 -回答機能+リアクション機能+ベストアンサー機能-
初心者向け : Railsログイン機能をつけてQAサイトを作る 4 -タグ付け機能-
初心者向け : Railsログイン機能をつけてQAサイトを作る 5 -管理画面機能-
初心者向け : Railsログイン機能をつけてQAサイトを作る 6 -検索機能-
今回は質問に対してタグをつけることができるようにします
質問内容が
- 動物
- 食べ物
- スポーツ
などわかりやすくするための機能です
データベース関係性
データベースの関係性はこのような形となります

通常であれば、Question modelからTag modelをhas_manyにして
たくさんのタグを作成したいところですが、
タグはQuestionを作成するユーザーごとに違うものを適用するか、
それとも全てのユーザーが同じタグを利用して管理をしやすくする、
どちらが良いでしょうか?
保守面で考えると後者が間違いなく便利です
なのでほとんどのシステムでは同じタグを質問ごとに紐づける
多対多というデータベースのリレーションが行われています
今まではQuestionに紐づくAnswersを全て取得して表示していました
これは一対多です。
多対多とはTagとQuestionがそれぞれ複数要素を持ち合っている状態です
複数持ち合うには、デーブルとテーブルの間にさらにテーブルを作成して
そこへTagのidとQuestionのidを入れておくことで関係性を持たせることができます
※テーブルとテーブルの間のテーブルのことを中間テーブルと呼びます
慣習として、テーブル(Question)とテーブル(Tag)の名前をつけることがあり、
今回はQuestionTagと名前をつけました。
TagとQuestionTag modelを作成する
いつも通りscaffoldで作りたいところですが、
コントローラーやhtml等は必要ないので、modelのみで行きます
$ rails g model Tag name
$ rails g model QuestionTag tag:references question:references
次はモデルにリレーションを与えていきます
question.rb
class Question < ApplicationRecord
  belongs_to :user
  has_many :answers, dependent: :destroy
  # question_tagsをたくさん持っている
  has_many :question_tags
  # question_tagsをたくさん持っていて、question_tagsを介してtagsをたくさん持っている
  has_many :tags , through: :question_tags
end
tag.rb
class Tag < ApplicationRecord
  # question_tagsをたくさん持っている
  has_many :question_tags, dependent: :destroy
  # question_tagsをたくさん持っていて、question_tagsを介してquestionsをたくさん持っている
  has_many :questions , through: :question_tags
end
question_tag.rb
class QuestionTag < ApplicationRecord
  belongs_to :tag
  belongs_to :question
end
最後にデータベースを適用させます
$ rails db:migrateTagにデータを追加する
コンソールでデータを追加します
結果の部分は見にくくなってしまうので削除しました
$ rails c
irb(main):001:0> Tag.create(name:"動物")
irb(main):001:0> Tag.create(name:"スポーツ")
irb(main):001:0> Tag.create(name:"ご飯")
irb(main):001:0> Tag.create(name:"その他")
こんな感じでデータを4つぐらい登録して、最後に確認を行いましょう
irb(main):010:0> Tag.all
  Tag Load (0.2ms)  SELECT  "tags".* FROM "tags" LIMIT ?  [["LIMIT", 11]]
=> #<ActiveRecord::Relation [#<Tag id: 1, name: "動物", created_at: "2019-07-27 03:38:38", updated_at: "2019-07-27 03:38:38">, #<Tag id: 2, name: "スポーツ", created_at: 07-27 03:39:08", updated_at: "2019-07-27 03:39:08">, #<Tag id: 3, name: "ご飯", created_at: "2019-07-27 03:39:17", updated_at: "2019-07-27 03:39:17">, #<Tag id: 4, name: の他", created_at: "2019-07-27 03:39:23", updated_at: "2019-07-27 03:39:23">]>
無事にデータが入ってます
Questionコントローラーとviewsに適用する
new, edit question_paramsを修正
class QuestionsController < ApplicationController
  before_action :authenticate_user!
  before_action :set_question, only: [:show, :edit, :update, :destroy]

  def index
    # ユーザータイプによって取得内容を変更
    @questions = current_user.questions if current_user.role == '質問者'
    @questions = Question.all if current_user.role == '回答者'
  end

  def index
    @questions = current_user.questions.all
  end

  def show
  end

  def new
    # 新規作成画面でタグを表示するため
    @tags = Tag.all
    @question = Question.new
  end

  def edit
    # 修正画面でタグを表示するため
    @tags = Tag.all
  end

  def create
    @question = current_user.questions.build(question_params)

    respond_to do |format|
      if @question.save
        format.html {redirect_to @question, notice: 'Question was successfully created.'}
        format.json {render :show, status: :created, location: @question}
      else
        format.html {render :new}
        format.json {render json: @question.errors, status: :unprocessable_entity}
      end
    end
  end

  def update
    respond_to do |format|
      if @question.update(question_params)
        format.html { redirect_to @question, notice: 'Question was successfully updated.' }
        format.json { render :show, status: :ok, location: @question }
      else
        format.html { render :edit }
        format.json { render json: @question.errors, status: :unprocessable_entity }
      end
    end
  end

  def destroy
    @question.destroy
    respond_to do |format|
      format.html { redirect_to questions_url, notice: 'Question was successfully destroyed.' }
      format.json { head :no_content }
    end
  end

  private

  def set_question
    @question = Question.find(params[:id])
  end

  def question_params
    # ここを修正
    params.require(:question).permit(:user_id, :title, :body, :best_answer_id, {:tag_ids => []})
  end
end
views/questions/_form.html.erbをこのように修正
<%= form_with(model: question, local: true) do |form| %>
  <% if question.errors.any? %>
    <div id="error_explanation">
      <h2><%= pluralize(question.errors.count, "error") %> prohibited this question from being saved:</h2>

      <ul>
        <% question.errors.full_messages.each do |message| %>
          <li><%= message %></li>
        <% end %>
      </ul>
    </div>
  <% end %>

  <div class="field">
    <%= form.label :title %>
    <%= form.text_field :title %>
  </div>

  <div class="field">
    <%= form.label :body %>
    <%= form.text_area :body %>
  </div>

  <!--ここを追加-->
  <div class="field">
    <% @tags.each do |t| %>
      <%= form.label t.name %>
      <%= check_box_tag "question[tag_ids][]", t.id, @question.tags.include?(t) %>
      <br/>
    <% end %>
  </div>

  <div class="actions">
    <%= form.submit %>
  </div>
<% end %>
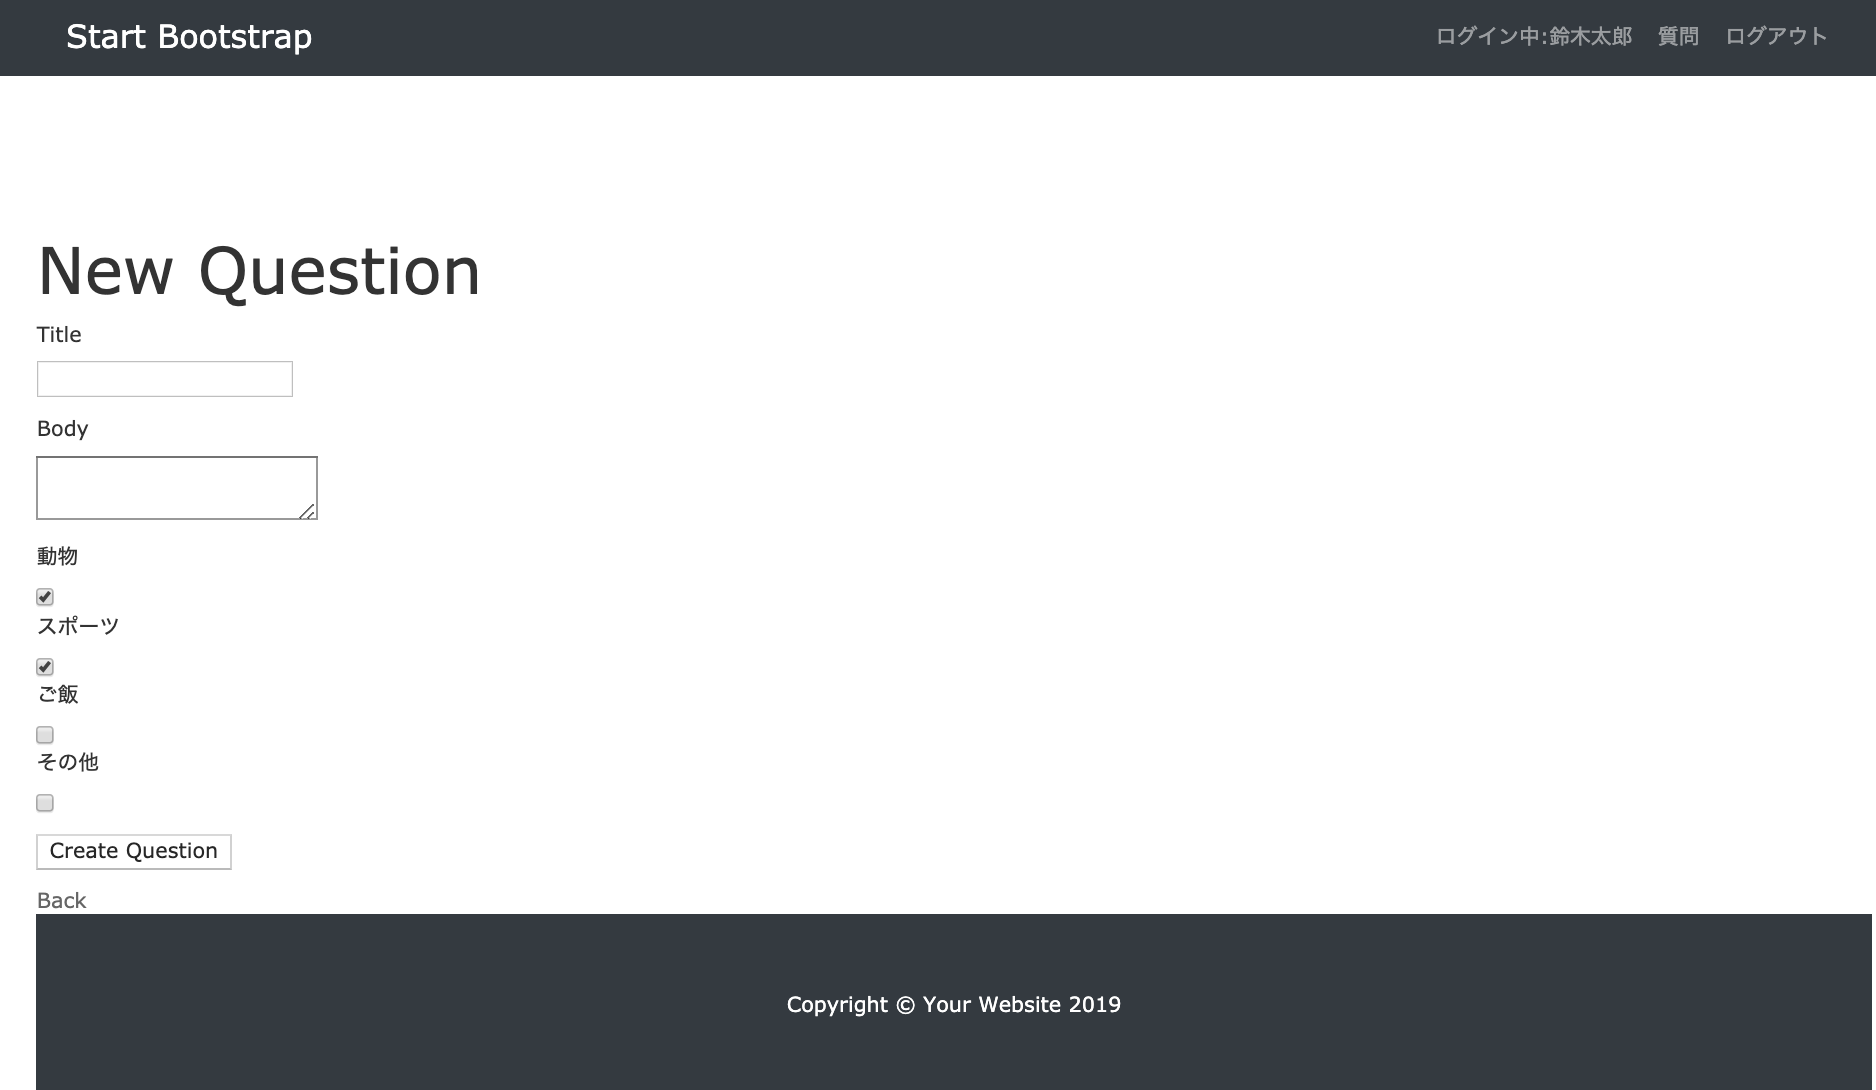
修正後、質問画面ではタグを選択できるようになっています

それでは適当にデータを作成して保存してみましょう
※必ずどれかのタグにチェックを入れてください
次はタグを確認できるように修正します
views/questions/show.html.erb
全部表示すると長くなるので、header部分のみ表示しています
これ以外には修正はありません
<header class="jumbotron my-4">
  <h2 class="card-title"><%= @question.title %></h2>
  <!--ここにボタン形式でタグを表示-->
  <% @question.tags.each do |tag| %>
    <button class="btn btn-info"><%= tag.name %></button>
  <% end %>
  <!--ここまで-->
  <% if current_user.role == '回答者' %>
    <%= link_to '回答する!', question_answers_path(@question.id), class: 'btn btn-primary btn-lg' %>
  <% end %>
</header>
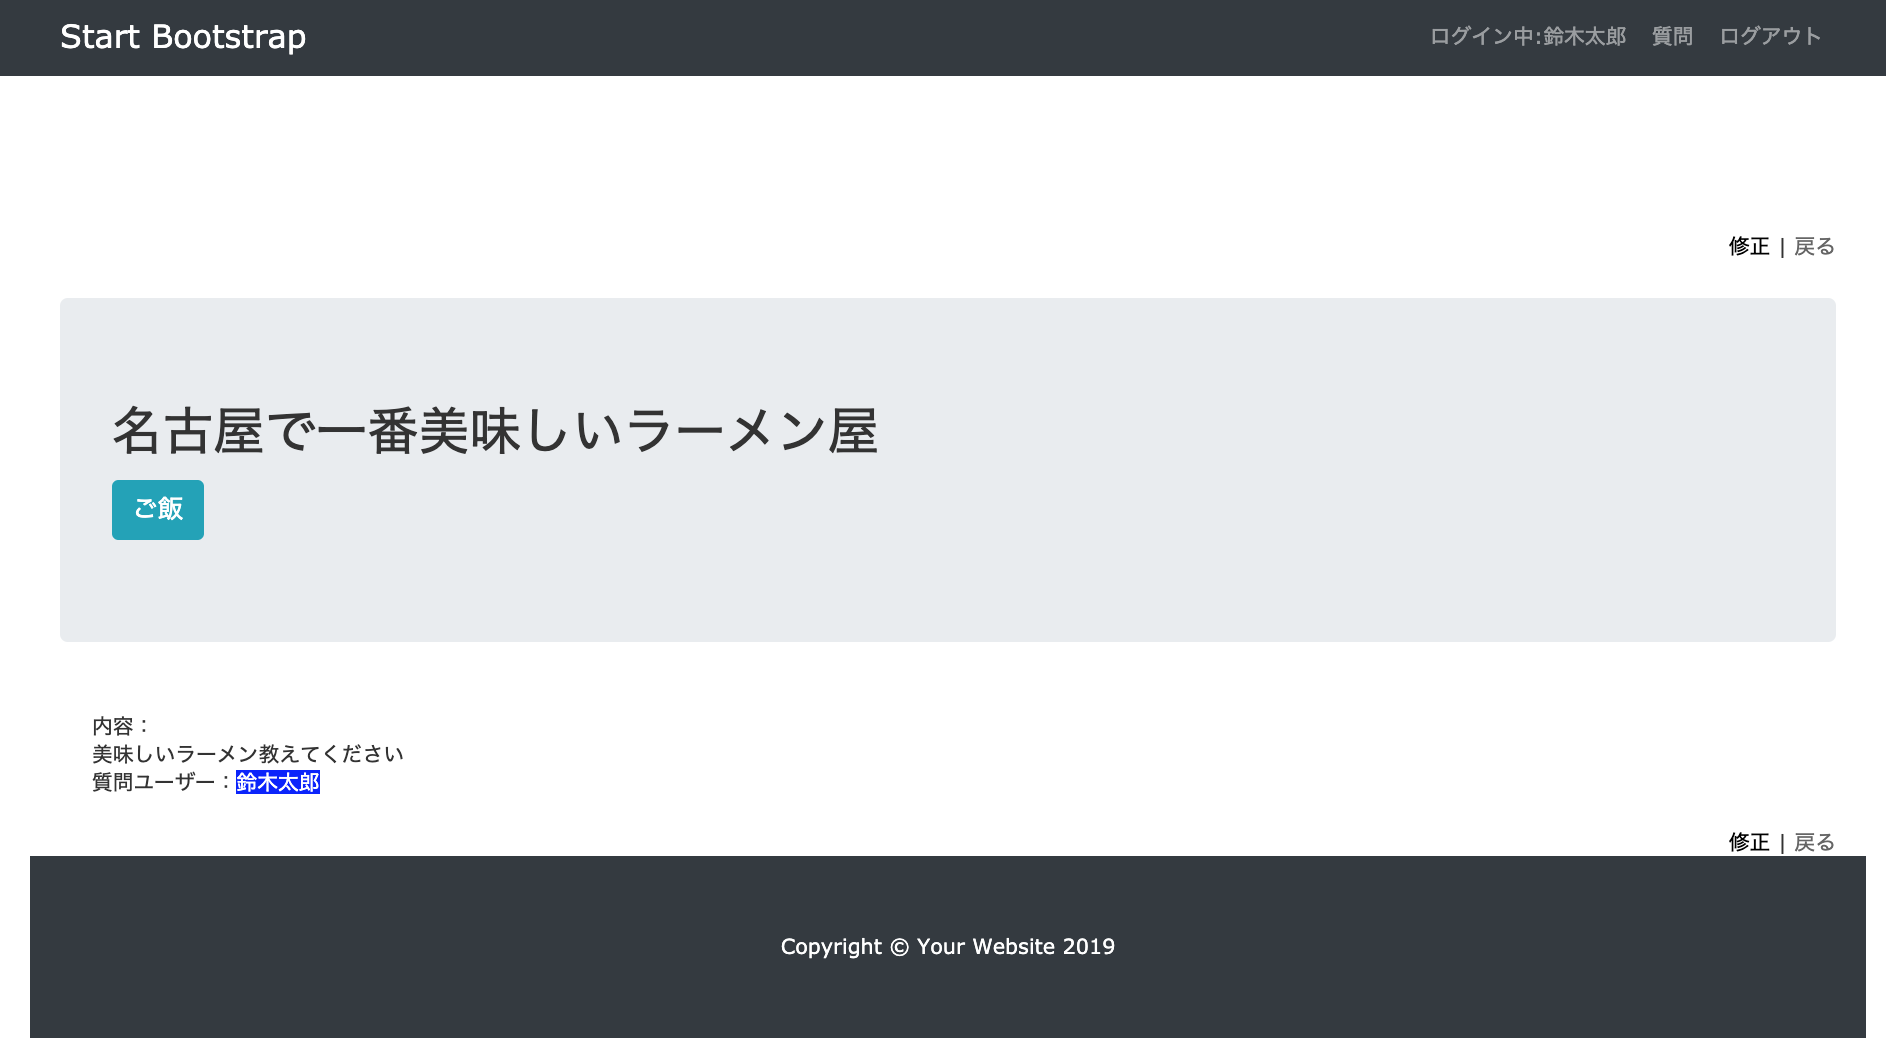
それでは確認しましょう

タグ追加後はタイトルのすぐ下にタグが表示されています!
ちなみにこのタグですが、複数追加すれば複数で表示されます
タグは検索できるとより便利になるので、次の次ぐらいからやります

コメントを残す