Dockerのbashからpostgresqlを操作する方法

dockerの中のpostgresqlを操作したいときにちょっと困ったので、念の為に記事に起こしてみました

まずは赤枠部分をクリック

するとterminalが開かれるので、こちらのコマンドをコピペ

psql -h localhost -U postgres

そう知るとpostgresqlに入れるので、このように操作を行うことが可能となります

postgres=#
postgres=# select * from pg_user;
 usename  | usesysid | usecreatedb | usesuper | userepl | usebypassrls |  passwd  | valuntil | useconfig
----------+----------+-------------+----------+---------+--------------+----------+----------+-----------
 postgres |       10 | t           | t        | t       | t            | ******** |          |
(1 row)

postgres=#

参考記事

Local Development Set-Up of PostgreSQL with Docker

M1 mac + dockerで gyp verb `which` failed Error: not found: python発生

M1で動かす際はmakeとpythonがどうやら足りていないみたいなので、こちらをdockerfileに追加することで問題を解決することがでいました

RUN apk add g++ make python

参考記事

Docker Node Alpine Image Build Fails on node-gyp

M1MacでDocker環境にnode-sass入れようとしたらエラー出たから解決した

さくらサーバー + Rails + HerokuでNet::SMTPFatalError 550 5.7.1 … Command rejected

RailsアプリをHerokuにデプロイしてさくらサーバーに設定してあるメールから、
メール送信を試みたところ、タイトルのエラーが発生しました

結論

「国外のIPアドレスブロックがかかっているから」が原因で、セキュリティを緩めることが解決策となります(whitelisetの方が当然望ましい)

こちらが手順で、まずはコントロールパネルに入って、セキュリティの項目に行きます

遷移した先の画面で、セキュリティを変更することでメール送信が可能となります

参考記事

herokuアプリでさくらサーバからメールを送りたい。

国外IPアドレスフィルタ

RailsのformをajaxでSPAっぽく実装する方法

SPAっぽいformの実装を無理なく実装する方法調べたら結構簡単そうにできたので、念の為記事で残してます

まずはformに remote: true を入れて非同期にします

<%= simple_form_for @order, url: path入れてください, remote: true do |f| %>

その後は、controller側で、jsonをreutrn

def create
  if @hoge.save
    render json: @hoge
  else
    render json, {}, status: 422
  end
end

次はjavascriptをこんな感じで実装

成功と失敗をそれぞれ定義しておいて、任意のイベントを発火させることで、SPA的な実装も簡単にいけました

$(document).on('ajax:success', () => {
  $('#priceModalTrigger').trigger('click');
});
  
$(document).on('ajax:error', () => {
  console.log('失敗!!!!');
});

参考記事

How to Use remote: true to Make Ajax Calls in Rails

Rails way of AJAX with remote: true

ReactのuseContextのテスト参考になったコード

ReactでuseContextのテストの実装を試みたところ、最初だったので結構詰まってしました。。。

色々と参考の記事を探したのですが、こちらのコードとzennのテキストが非常に参考となったため、
ほぼそのまま利用してそれをテスト記述しました🙇‍♂️

※こちらのコードはzennから参照させていただいております。リンクはブログの最下部に記載。

// contextのコード
import { createContext, useCallback, useContext, useReducer } from "react"

type AlertState = {
  show: boolean
  message: string
}
type AlertDispatch = {
  showDispatcher: (message: string) => void
  hideDispatcher: () => void
}
const initialState = {
  show: false,
  message: ""
}
const alertStateContext = createContext<AlertState>(initialState)
const alertDispatchContext = createContext<AlertDispatch>({
  showDispatcher: () => void 0,
  hideDispatcher: () => void 0
})

export const useAlertState = () => useContext(alertStateContext)
export const useAlertDispatch = () => useContext(alertDispatchContext)

export function AlertProvider({ children }: { children: JSX.Element[] | JSX.Element }) {
  const [state, dispatch] = useReducer(reducer, initialState)
  const showDispatcher = useCallback((message: string) => dispatch(showAlert(message)), [])
  const hideDispatcher = useCallback(() => dispatch(hideAlert()), [])
  return (
    <alertStateContext.Provider value={state}>
      <alertDispatchContext.Provider value={{ showDispatcher, hideDispatcher }}>
        {children}
      </alertDispatchContext.Provider>
    </alertStateContext.Provider>
  )
}

type AlertAction = ReturnType<typeof showAlert> | ReturnType<typeof hideAlert>

function reducer(state: AlertState, action: AlertAction) {
  switch (action.type) {
    case "ui/alert:show":
      return {
        ...state,
        show: true,
        message: action.payload.message
      }
    case "ui/alert:hide":
      return {
        ...state,
        show: false
      }
    default:
      return state
  }
}

function showAlert(message: string) {
  return {
    type: "ui/alert:show",
    payload: {
      message
    }
  } as const
}

function hideAlert() {
  return {
    type: "ui/alert:hide"
  } as const
}

// テストコード
import { act, cleanup, renderHook, RenderResult } from "@testing-library/react-hooks"

import { AlertProvider, useAlertDispatch, useAlertState } from "./AlertContext"

function wrapper({ children }: { children: JSX.Element[] }) {
  return <AlertProvider>{children}</AlertProvider>
}

function useAlertContextTest() {
  const { show, message } = useAlertState()
  const { showDispatcher, hideDispatcher } = useAlertDispatch()
  return {
    show,
    message,
    showDispatcher,
    hideDispatcher
  }
}

describe("AlertContext", () => {
  let renderResult: RenderResult<ReturnType<typeof useAlertContextTest>>

  beforeEach(() => {
    const { result } = renderHook(() => useAlertContextTest(), { wrapper })
    renderResult = result
  })
  afterEach(() => {
    cleanup()
  })

  test("context: initial state", () => {
    expect(renderResult.current.show).not.toBe(true)
    expect(renderResult.current.message).toBe("")
  })
  test("context: update state", () => {
    // show
    act(() => {
      renderResult.current.showDispatcher("test message")
    })
    expect(renderResult.current.show).toBe(true)
    expect(renderResult.current.message).toBe("test message")
    // hide
    act(() => {
      renderResult.current.hideDispatcher()
    })
    expect(renderResult.current.show).not.toBe(true)
  })
})

参考記事

Context を扱うコンポーネント:ユニットテスト

https://github.com/tkdn/react-testing-sandbox/blob/d564b0e24a3829d0d52fc170a2a559c71fad67ac/src/context/AlertContext.test.tsx

https://github.com/tkdn/react-testing-sandbox/blob/d564b0e24a3829d0d52fc170a2a559c71fad67ac/src/context/AlertContext.tsx

Tailwindの.clearfixでUIが壊れる場合の対処法

chat uiをネットで探してコピペして使っていたら、なぜかUIが崩れる問題が発生していて、それがバージョンの違いであることがわかりました

どうやらTailwindは1系と2系では若干動作が異なるところがあるようで、今回のケースで行くと .clearfix というclassが2系では使えず、flow-root というclassに変更する必要が発生したみたいです

<div className="flow-root">
            <div className="bg-gray-300 w-3/4 mx-4 my-2 p-2 rounded-lg">
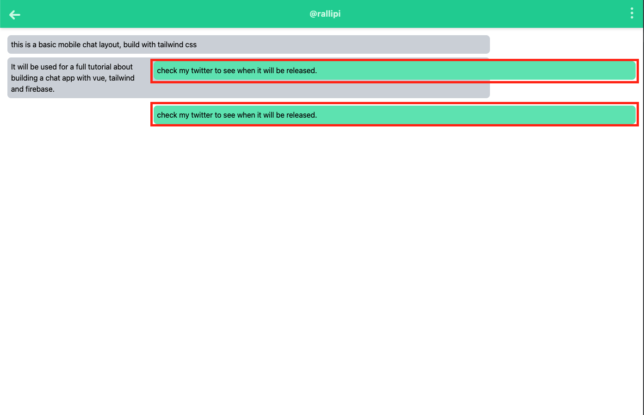
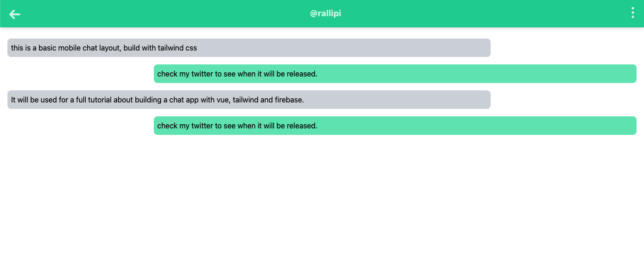
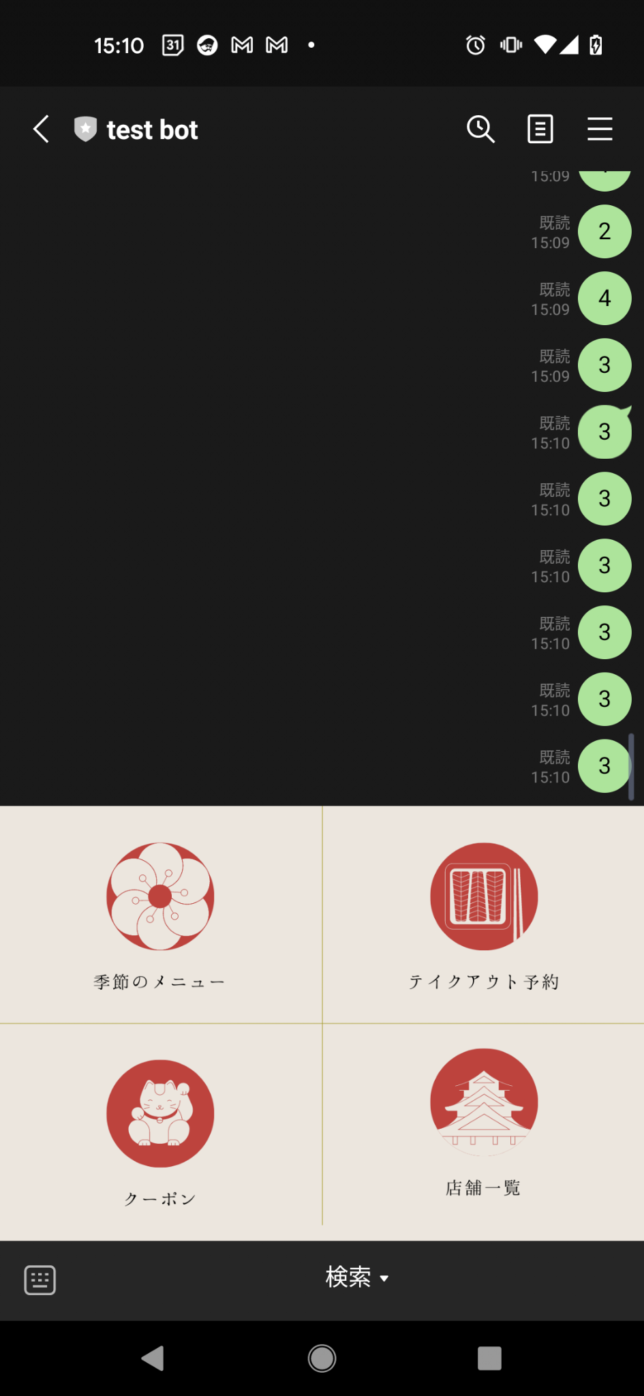
              this is a basic mobile chat layout, build with tailwind css
            </div>
          </div>
          <div className="flow-root">
            <div className="bg-green-300 float-right w-3/4 mx-4 my-2 p-2 rounded-lg clearfix">
              check my twitter to see when it will be released.
            </div>
          </div>

          <div className="flow-root">
            <div className="bg-gray-300 w-3/4 mx-4 my-2 p-2 rounded-lg clearfix">
              It will be used for a full tutorial about building a chat app with vue, tailwind and firebase.
            </div>
          </div>
          <div className="flow-root">
            <div className="bg-green-300 float-right w-3/4 mx-4 my-2 p-2 rounded-lg clearfix">
              check my twitter to see when it will be released.
            </div>
          </div>

classを変更すると、こんな感じで正常に機能します🙌

参考記事

Build a mobile chat layout with tailwindcss

Upgrade Guide

Active Adminのformの画像修正inputに画像を表示する方法

Active Adminのformに画像を追加して、修正する際に既に登録されている画像を表示する方法を調べたのですが、情報がほとんどなく、非常に苦労したので、方法を共有します

※Active Adminにtheme入れてるのでUI若干異なります

結論、hintで対応

f.inputs t('activerecord.models.job_image') do
  f.has_many :job_images, heading: false, allow_destroy: true, new_record: true do |ff|
    ff.input :image, as: :file, hint: image_tag(ff.object.image.to_s, width: 100)
  end
end

上記に辿り着くまでに、

  • react
  • cocoon

で対応もしたのですが、どちらもいい感じに作れないし、なんかモヤっとするしで、それでも諦めずに調査してたらhintが見つかったので使ってみたところ、うまく行きました

参考記事

activeadmin+paperclipで画像管理機能導入メモ

LINE messaging APIでリッチなUIを作る

ZoffのchatみたいなUIを作るために、いろいろ調べてみたら、rich menusという機能があるらしく、
Zoff的なUX実現のためにコード作ってみました

作り方

画像の準備

canvaで1200 * 810をテンプレ使って作成しました(確認のためだけなので、よければ使ってください)

大きさは一応決まっているようですが、UXを実現したいだけなので、適当なテンプレ使ってます
画像の大きさについてのdocument

rich menuを作るためにPOSTMANからrequest送信

url: https://api.line.me/v2/bot/richmenu
HTTP: POST

Headers:
  Authorization: Bearer チャンネルアクセストークン
  Content-Type: application/json


Body:
  {
    "size":{
        "width":1200,
        "height":810
    },
    "selected": true,
    "name":"検索",
    "chatBarText":"検索",
    "areas":[
        {
          "bounds":{
              "x":0,
              "y":405,
              "width":600,
              "height":810
          },
          "action":{
              "type":"message",
              "text":"1"
          }
        },
        {
          "bounds":{
              "x":600,
              "y":405,
              "width":1200,
              "height":810
          },
          "action":{
              "type":"message",
              "text":"2"
          }
        },
        {
          "bounds":{
              "x":0,
              "y":0,
              "width":600,
              "height":405
          },
          "action":{
              "type":"message",
              "text":"3"
          }
        },
        {
          "bounds":{
              "x":600,
              "y":0,
              "width":1200,
              "height":405
          },
          "action":{
              "type":"message",
              "text":"4"
          }
        }
    ]
  }

richMenuIdがreturnされたらOKです

{
    "richMenuId": "ここにidが入ってます"
}

画像を登録

url: https://api-data.line.me/v2/bot/richmenu/{richMenuId}/content
HTTP: POST

Headers:
  Authorization: Bearer チャンネルアクセストークン
  Content-Type: image/png

上記を設定したら、画像を設定して送信してみます

送信して完了だと、200 statusと下記の内容が返ってきます

{}

作成したrich menuをセットする

url: https://api.line.me/v2/bot/user/all/richmenu/{richMenuId}
HTTP: POST

Headers:
  Authorization: Bearer チャンネルアクセストークン
  Content-Type: application/json

上記の内容でrequestを送ると画像登録と同様にreturnされます

{}

そして再入室すると、このような画面になっています!!

参考記事

LINEBotのMessageAPIでのリッチメニューの作り方

HerokuにGo Ginをデプロイするコード

シンプルな情報がなかったので一応コードとしてまとめました🙏

go mod init linebot
go get -u github.com/gin-gonic/gin
// main.go
package main

import (
	"net/http"

	"github.com/gin-gonic/gin"
)

func main() {
	r := gin.Default()
	r.GET("/", func(c *gin.Context) {
		c.JSON(http.StatusOK, gin.H{
			"message": "hello",
		})
	})

	r.Run()
}

// Procfile
web: bin/linebot // linebot部分はアプリ名を入れる

あとはherokuにデプロイすればOKです

こちらのheroku-releaseブランチにコードまとめてあるので、参照してください

masahiro04/linebot

参考記事

Go言語とginで作ったHTTPサーバをHeroku上で動かしてみる